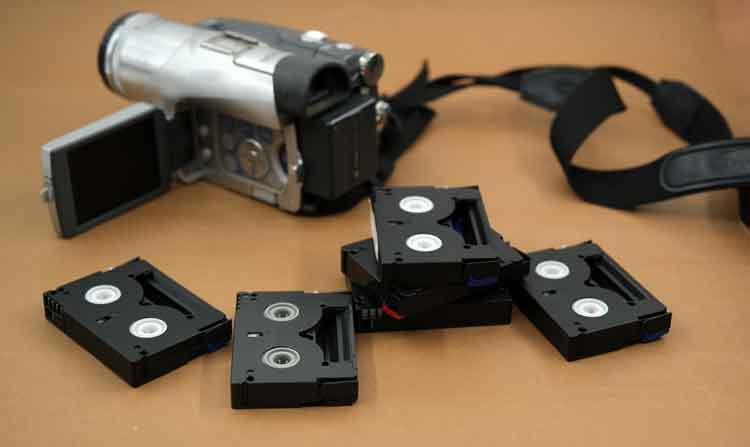
Converting your old MiniDV tapes to digital format is one of the best ways to preserve your family memories, special events, or creative projects. MiniDV tapes were once the go-to recording medium for camcorders in the late 1990s and early 2000s, but as technology evolved, these tapes became outdated. Unfortunately, with time, MiniDV tapes degrade, and the camcorders needed to play them are hard to find. That’s why learning how to perform MiniDV to digital conversion at home can save your memories and make them easier to view, edit, and share.
This guide will walk you through everything you need to know — from the necessary equipment to step-by-step instructions — to help you easily convert your MiniDV tapes to a digital format in the comfort of your own home.
Why Convert MiniDV to Digital
MiniDV tapes contain magnetic tape that deteriorates over time, leading to loss of quality, glitches, or even complete data loss. Converting MiniDV to digital ensures your footage stays safe for years. Once digitized, your videos can be easily stored on your computer, external drive, or even the cloud.
Here are a few key benefits:
- Preservation – Digital files don’t degrade like tapes do. Once converted, your videos will remain in their original quality for decades.
- Easy Sharing – Share digital copies with friends and family instantly via email or social media.
- Convenient Storage – Store hundreds of hours of footage on a single hard drive instead of bulky tapes.
- Simple Editing – Edit videos using software like Adobe Premiere Pro, Final Cut Pro, or iMovie.
Converting MiniDV to digital isn’t as complicated as it sounds. You don’t need professional equipment or expensive services — just a few tools and some patience.
What You Need for MiniDV to Digital Conversion
Before starting, make sure you have the following items ready:
- MiniDV Camcorder or Deck – You’ll need the camcorder that recorded your MiniDV tapes or any compatible MiniDV playback device. It must have a FireWire (IEEE 1394) or USB output.
- FireWire or USB Cable – Most MiniDV camcorders use a FireWire connection for the best transfer quality. Some newer models also use USB.
- Computer with FireWire or USB Port – If your computer doesn’t have a FireWire port, you can buy an adapter or PCIe FireWire card.
- Video Capture Software – Programs like WinDV (for Windows), iMovie (for Mac), or Adobe Premiere can record video from your camcorder.
- Storage Space – Ensure your computer has enough free space. MiniDV tapes store about 13GB per hour of footage.
Having these tools ready will make the MiniDV to digital conversion smooth and efficient.
Step-by-Step Process to Convert MiniDV to Digital
Step 1: Set Up Your Camcorder
Start by connecting your MiniDV camcorder or deck to your computer. Plug one end of the FireWire or USB cable into your camcorder and the other end into your computer. Make sure your camcorder is set to “VCR” or “Playback” mode.
If your computer recognizes the device, you’re ready to start the transfer. If not, check your cable connections or install the necessary camcorder drivers.
Step 2: Choose the Right Capture Software
Depending on your operating system, select a capture program:
- Windows Users: WinDV or Adobe Premiere Pro
- Mac Users: iMovie or Final Cut Pro
These applications detect your camcorder automatically and allow you to control playback directly from your computer.
Step 3: Play and Capture the Video
Open your capture software and press “Record” or “Capture.” Then, hit “Play” on your MiniDV camcorder. The software will record the video in real-time — meaning if your tape is 60 minutes long, it will take 60 minutes to capture.
During the process, avoid using your computer for other tasks to prevent dropped frames or audio issues.
Step 4: Save and Convert the File
Once the recording is complete, save your captured footage. Most software saves the raw video as an AVI or MOV file. You can then compress or convert it to MP4, a widely supported digital format that’s easier to share and store.
There are free tools like HandBrake or VLC Media Player that can help convert your files from AVI to MP4 without losing quality.
Step 5: Edit and Enhance Your Videos
Now that you have your digital files, you can enhance them using basic video editing software. Adjust brightness, contrast, or sound levels, and trim unwanted parts. This is the perfect opportunity to add titles, music, or transitions to make your footage look professional.
Step 6: Store and Backup Your Digital Files
Once your MiniDV to digital conversion is complete, create multiple backups to protect your data. Store copies on an external hard drive, a USB stick, and cloud storage platforms like Google Drive, Dropbox, or iCloud.
Label your files clearly with the date and event name so you can easily find them later.
Tips for Better MiniDV to Digital Conversion Results
To ensure the best quality and smooth process, keep these tips in mind:
- Clean Your Camcorder Heads: Dirty playback heads can cause lines, distortions, or missing frames during transfer. Use a MiniDV head cleaning cassette before conversion.
- Avoid Rewinding Too Often: Constant rewinding can wear out old tapes, so plan your captures in one go.
- Maintain Battery Power: Always plug your camcorder into a power source during conversion. Battery interruptions can ruin the transfer.
- Check Audio Levels: Make sure your audio doesn’t distort or drop out during playback.
- Keep Original Tapes: Even after converting MiniDV to digital, keep the original tapes as a physical backup.
Alternative Methods: Using a Capture Device
If your computer doesn’t support FireWire, you can use a video capture device that connects your camcorder’s RCA (AV) outputs to your computer via USB. These devices come with easy-to-use software that helps capture footage directly in MP4 format.
While the quality may not match FireWire transfers, it’s a convenient and affordable option for quick MiniDV to digital conversions.
Common Problems and How to Fix Them
- No Video Signal Detected
- Make sure the camcorder is in playback mode and properly connected.
- Check if the FireWire cable or port is functioning.
- Audio Out of Sync
- This happens when the computer lags during recording. Try closing other apps or using a faster hard drive.
- Dropped Frames or Glitches
- Ensure you’re using high-quality cables and enough system memory.
- Software Doesn’t Recognize Camcorder
- Install drivers or try another FireWire port. Some newer operating systems may require legacy driver support.
Enjoy Your Digital Memories
Once you’ve completed the MiniDV to digital conversion, you’ll have your cherished videos preserved in a modern, easy-to-access format. You can edit them, create highlight reels, or share them online with friends and family.
Converting MiniDV tapes to digital might seem like a technical challenge, but with the right tools and steps, it’s simple and rewarding. Not only will you protect your valuable memories from degradation, but you’ll also make them easier to enjoy anytime, anywhere.